Blog & Recipes — Susan Teton

Viewing entries tagged
raw food recipes

Comment

Share

Raw Creamy Mint Dressing

This dressing is to live for. It is full of nutritious power and really refreshing and delicious. You can use it on any raw veggie salad or cooked veggies, grains or whatever sounds good to you.  I find it lasts for about 4-5 days when kept chilled!

Creamy Mint Dressing

½  cup     sunflower seeds (soaked - 3 hours or longer)

⅓  cup     olive oil

½  cup     filtered water

¼  cup     lime juice

2         garlic gloves

¼  cup     fresh mint leaves (use dried mint if fresh is not available)

1 tsp         onion powder (or a chunk of onion – green onions are good)

¼  tsp     celtic sea salt

Blend all ingredients into creamy consistency. I love this dressing. It is awesome with mixed greens, chopped cabbage, sliced cucumbers, and tomatoes.

Keeps when chilled for about 4-5 days.


Comment

Share

Comment

Share

The Best Way To Eat Carrots

This may just seem so simple and trivial for a post, but, let me tell you that making carrots this way is a huge benefit, particularly for kids. 

When the carrots are grated on the very small (slanted) element of the grater, the carrot pieces fall into nice little pile that kind of sticks together. Put a pile on the side of a bowl of soup, on salads, top on avocado toast, in a wrap, or just on the side of a plate as a garnish. 

Grating it in this way makes the carrot juicy. This is the key. It will juice up a sandwich or wrap with sweet flavor. The reason it works so well with kids, is that the carrots are juicy, which means sweeter. It is also easier for them to chew.

In a salad, you might think that the little pieces will spread around, but they don't. They seem to stick together in a clump. If you use a delicious dressing like the The Golden Elixir, or the Maple Lemon Miso, you will delight in the way that you will get a bite of juicy carrot with the dressing infused in. Try it! 

If you use them on a sandwich, wrap or toast, add a little salt, perhaps some Tamari, olive oil, or any salad dressing you want to top them with for another flavorful dimension. You can also grate a beet in the same way.

If you want more handy hints of how to eat some foods raw, get my Raw Food Basics course. This course it great for learning how to make sauces and dressing, and use nuts and seeds in the most healthy way. Some have called it the best Raw Food Course available.

Visit my Indigogo Campaign if you would love to support my upcoming book, Eating As A Spiritual Practice. Support offers perks for courses, private coaching, and so much more. Go HERE for more info.

Comment

Share

3 Comments

Share

Support My Campaign on Indiegogo to Publish Eating As A Spiritual Practice!

Help publish my book by supporting me on indiegogo HERE

If you want to truly awaken, alleviate stress, prevent disease, live your purpose and dreams, become healthy and vibrant, all while making a meaningful contribution to the world and your communities, you must start making Eating a Spiritual Practice.

That’s a tall order. Yet, one of the single most powerful things you can do to create a better world, and a better you, is to become aligned with your source, the Earth, and your plate.

Eating As a Spiritual Practice will awaken you to:

  • the profound global repercussions of your food choices.
  • the power food has to reverse almost any condition.
  • why now, more than ever, we must love ourselves enough to become our own purpose.
  • the incentive for abandoning diets, and eating from the Earth and not the factory.

Contribute Now on indiegogo!

Today, we know more about health than ever. We have the most advanced medical systems as well, and yet, we have alarming rates of chronic illnesses. We also have problems with feeding the world, and sustainable food security. What is really going on here?
Author and chef, Susan Teton, says, “It’s all about the food,” but not about diets, proteins, carbohydrates or fats. Eating As a Spiritual Practice inspires a brave new way of eating: dropping diets, and enjoying the bounty of food from the Earth (and not the factory). Adopting a “spiritual practice around food” provides profound personal and global benefit for our present and future generations. Plus, Susan’s story will touch your heart and soul, in ways you may have never considered, as she inspires you with a lively, mouthwatering combination of raw, cooked and cultured foods.

Out in April!  Contribute

3 Comments

Share

Raw Banana/Mango Pecan Pie

Comment

Share

Raw Banana/Mango Pecan Pie

This Raw Banana/Mango Pecan Pie rocks. If you do not have a dehydrator, use your oven. 

Here is the recipe:

Raw Banana Mango Pecan Pie

5 bananas

1 mango sliced

1 cup pecans (soaked in water for 1 hr)

1 1⁄2 cups pecans (not soaked)

6 oz filtered water

5-10 dates, soaked

1 tsp vanilla

1 heaping tsp raw honey (or more to taste)

A dash Tamari or Nama Shoyu

Soak one cup of pecans in water


Fruit Crust

In a glass pie pan, arrange one layer of sliced bananas (2 1/2 bananas should do it).

Lay the banana slices in a spiral pattern with one slice slightly overlapping the other until you have covered the entire pie pan.

Put a layer going up the sides of the pie pan as well.

Cut the mango into thin (1/4 inch) slices and layer over the banana. Put another layer of bananas over the mango. Compress the fruit down evenly with your hands. Set aside.

Pecan Cream Filling

Put 1 cup of soaked (drained) pecans, dates, 6 oz. filtered water and vanilla into blender and blend into to a fine cream. Taste the cream, and if it is not sweet enough for your taste, add more dates.

Pour the Pecan Cream Filling over the fruit in the pie pan. Put into dehydrator at 95 F for 3 hours, or your oven at the lowesttemperature possible.

If you are using an oven make sure you keep a good watch on the pie. Depending on the temperature of the oven, it could be that only an hour is need, perhaps even less. The idea is to get the mixture to congeal and NOT cook.

Blend honey with just a little water and a dash of the Tamari orNama Shoyu.

Toss the soaked pecans by tossing gently with the honeyed water to coat the pecans.

When the pie is ready, out of the dehydrator or oven, place one layer of the honeyed pecans on top of the pie. Place them in a circle inside a circle, artistically placed towards the center of the pie.

Chill pie for one hour or longer before serving. Keeps for a few days in the refrigerator.


Comment

Share

Comment

Share

Luscious Fruit Hemp Pudding or Cereal

Finally the answer to gluten free, dairy free, sugar free and still luscious!

Berry Hemp Pudding with Colostrum & Lecithin

Whoa, does that sound appetizing? Well not really. But, truthfully in this day of gluten free, dairy free, grain free and sugar free, where are we going to get that yummy creamy pudding or morning cereal?

Well, I’ve got a treat for you. This recipe was made after I did a photo shoot for Healthy Living Magazine. I was working with ImmuneTree’s Colostrum6, adding it to smoothies and hot drinks. It is so yummy to be used as a creamer.

The following day I found these exquisite local dark blue/purple berries from up country Kula. They were slightly tart and since I am avoiding sugar, I suddenly had an idea.  I am not crazy about Stevia, but if used properly it can serve the purpose well. Stevia is great with bitter or tart foods, and the trick is to use very little. When you are using citrus or tart berries, it will provide just enough sweet to make it yummy. Then I thought of the Hemp Hearts and lecithin, my latest favorite for green smoothies and all smoothies for that matter.

The recipes below have a powerhouse of nutrients and satisfy the need for rich, sweet, creamy and fulfilling. The hemp seeds provide protein and excellent fats, the lecithin provides inspiration for healthy cell function, and the Colostrum6 provides a boost for a healthy gut, immunity and muscle integrity. The berries are full of antioxidants and great fiber and flavor. Need I say more? Ok, I will. One more thing, all of these foods combined make a rich and smooth texture and deliver the wonderful tastes we so love with rich dairy.

Seriously, it is yummy, and also good with other fruits.

Below two recipes for this fantastic new treat – great for breakfast and/or an afternoon snack.

Berry Hemp Pudding

Ingredients

1 cup               berries

1/3 cup          hemp seeds (also known as Hemp Hearts)

1 tbsp             Lecithin

1 tbsp             Colostrum6 by ImmuneTree

¼ cup              water – more if needed for consistency

                        Juice of fresh lime

                        Sweeten as needed with Stevia, honey or sugar

Blend all these together and add some lime! Top with Barleans' Forti Flax, raisins, walnuts or whatever you fancy.


Apple Hemp Pudding

Ingredients

1 apple           chopped  - green apple if you are on a low sugar diet

1/3 cup          hemp seeds (also known as Hemp Hearts)

1 tbsp             Lecithin

1 tbsp             Colostrum6 by ImmuneTree

¼ cup              water – more if needed for consistency

pinches           cinnamon & ginger too if you wish

                        Top with juice of fresh lime and any of the topping mentioned above

Enjoy!


Comment

Share

Comment

Share

Purple Sweet Potatoes or Yam with coconut Oil & Cilantro

This colorful dish can be all yours within 15 minutes. Simply wash, peel and chop your favorite sweet potato, yam or squash into small pieces. Steam or boil the small pieces until tender. Transfer to serving dish and toss with a tsp. of coconut oil (or, flax oil, Ghee or pasture butter). Then top with fresh cut Cilantro and Celtic Sea Salt. Drizzle a tsp. of honey and squeeze of lemon or lime. Could it be that simple? Yes! Try this delicious dish in the evening when you want an explosion of flavors to revitalize and relax you. It is so rich and fulfilling you will not be tempted for a dessert of any kind.

Ingredients:

Sweet Potato, Yam or Squash

Coconut Oil, Flax Oil, Ghee or Pasture Butter

Honey and Lemon or Lime juice


Comment

Share

1 Comment

Share

Raw Almond Seed Cheese on BuckWheat Crackers

What an amazing afternoon, before dinner or anytime snack or meal. Yum.

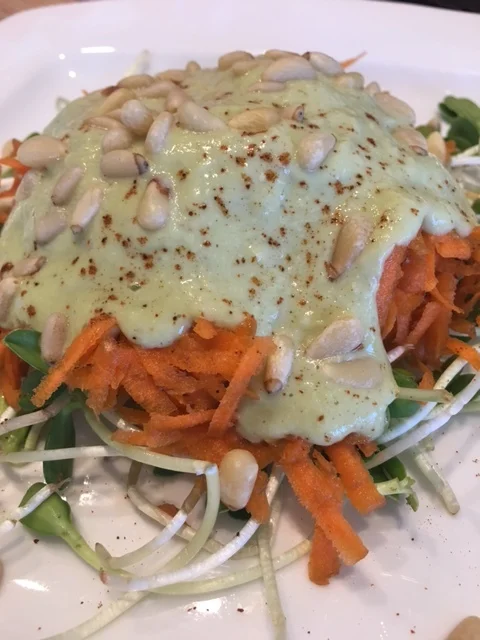
What is that beautiful white creamy stuff on top of the avocado? It is Almond Seed Cheese. The avocado and seed cheese are piled high on top of a Raw BuckWheat Pizza Dough Cracker.

The recipe and instructions are below. It may seem like a lot of work is involved. But, it you do it in stages, it is effortless, as each step is easy. The secret to raw food is getting in a flow and planning ahead. Some people keep a tight schedule, never running out of their yummy raw snacks.  I go by feel, and when I am out of my favorites I get inspired.

I call the crackers "Pizza Dough Crackers" because they are more moist than typical raw food crackers. Their moistness is due to the use of olive oil in the recipe. You can't dry out olive oil so the dough cracker has more of a bread consistency.  They have a robust flavor, and a texture that is more chewy than traditional raw food crackers. What is really great is that these dough crackers substitute the need for traditional breads. In keeping with the theme of mixing raw and cooked, they are also great with egg salad, tuna, raw goat cheese, avocado, tomato, onions, and cultured veggies. Read below for the recipes and custom make them as you like.

Schedule for making BuckWheat Pizza Dough Crackers:

1. Soak buckwheat and sunflower seeds, over night (or in the morning if you want to make the crackers later in the afternoon, because neither buckwheat or sunflower seeds take long to soak - minimum of about 2 hours).

2. The next day, or later the same day, blend the ingredients for the dough crackers and place in the dehydrator for drying (about 18 hours - turning once). If you use an oven then set it to the lowest temperature. Note, they may dry faster in an oven.

3. When finished,  store them in an airtight container and you will have them for weeks. Refrigeration keeps them fresher longer.

* A scheduling note: If you soak the seeds and then run out of time and can't make the recipe, you can store the seeds and/or nuts until ready to prepare them. Simply rinse the seeds/nuts well and store them in filtered water in the fridge until ready to use. If you go more than one day without using them, just change the water and they will be good for another day. I like to use them within a couple days. Most importantly, change the water each day.

Scheduling for Almond Seed Cheese:

1. Soak almonds for at least 8 hours. Sometimes, I change the water and let them soak again for several more hours. Overnight is always good. If you are not ready to make the cheese the next morning, just change the water and let them soak until you are ready. If you run out of time again, then store them in the fridge in fresh filtered water.

2. After the almonds are soaked it is nice to blanch them and remove the skins. This is not absolutely necessary, but blanched almonds will produce a beautiful white cheese. You can store them with or without the skins. Since the removing of skins can be tedious and time consuming, you might like to schedule it around a good TV program, movie and/or make it a mindful meditation.

Again, plan ahead. The cracker will last for weeks if kept in an air tight container.  The seed cheese needs to be eaten within about 4-5 days.

Recipe: BuckWheat Pizza Dough Crakcers

1 cup saoked buckwheat groats 1 cup soaked sunflower seeds 1/2 cup soaked ground flax seeds
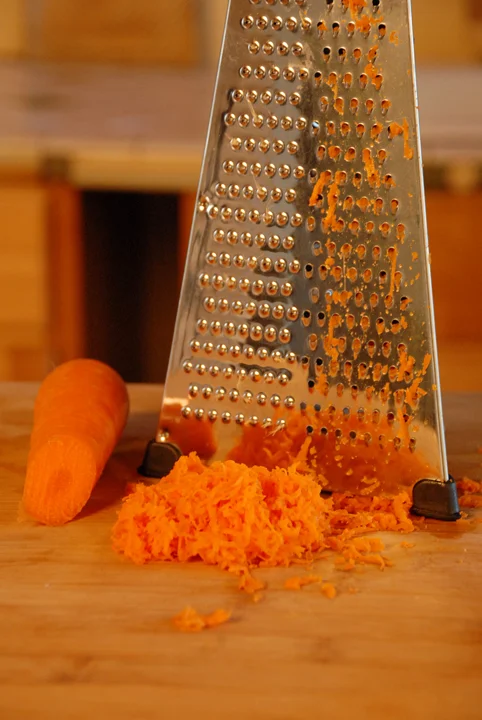
 2 carrots 1/3 cup olive oil 1 tbsp Italian seasonings (or fresh herbs to taste)

Salt to taste and add garlic, cayenne and any other spices you might like.

Directions: Mix all ingredients together in a food processor. Start with the carrots, then groats and seeds, remaining ingredients. Coat a dehydrator sheet or a cookie sheet with a small amount of olive oil and scoop batches of dough out to make rounds. You can make a large pizza dough (about 6 inches in diameter) – or you can make smaller individual rounds (about 3 inches in diameter), which is my preference. The smaller rounds are easier to serve and eat.

Press out the dough evenly to about 1/4 to 1/2 inch thick, by patting the top with your finger tips. If it gets too sticky and hard to work with, dip your fingers into some orange or other citrus juice. Once crust is pressed out evenly, dehydrate at 100-115 overnight or about 7 hours or until crust is dry enough to turn over and transfer to the mesh rack. Use a spatula when lifting dough and be very careful when turning and transferring it. Dehydrate for another  8 hours or until completely dry. If crust is dry, and stored in a cool dry air tight container, it can be kept fresh for up to a month.

Note: I like to use olive oil because it gives the dough crackers a moistness which is more like bread. Use more oil for more moistness. If you do use a lot of oil, you will need to refrigerate to store.

Recipe: Almond Seed Cheese

2 cups almonds - soaked

2-3 cups filtered water

Salt to taste, spices of choice

Directions: Rinse almonds well. Blanch to remove skins by putting nuts into boiling water for about 1 minute. Remove from heat and strain. Using your fingers, squeeze the nuts and the skin should roll right off.

Blend the almonds in enough water so that they blend easily. Blend until creamy, which usually warms them a little as well. Pour mixture into a cheese cloth bag to ferment. Squeeze out excess moisture over a bowl so that the precious milk does not go to waste (I always drink it right then). Don't squeeze the bag dry or you will get a dryer cheese. Hang the bag with a bowl to catch the drippings underneath it. The seed cheese will then take another 12 to 24 hours to ferment. Preferably, the cheese should ferment in the dark. Since I do not have a dark closet to hang the bag in, I hang mine on a cupboard door knob with a bowl under it, then cover it with a paper bag to keep the light out. I usually ferment overnight alleviating the need to cover it with a bag.

Enjoy!!!

Would you like visual instruction on how to make Raw Pizza Dough Crackers and Seed Cheeses? You can on my Raw Food DVD series. See a sample here: Raw Food DVD Series. And, if you want to experience Essential Cuisine, the wonderful healthy world of "Raw, Cooked & Cultured Foods", take my 4-Week Dietary Makeover online course. The course includes my DVD collections, plus audio programs, recipes, shopping lists and so much more!


1 Comment

Share

1 Comment

Share

Sesame Seeds, Sacred Clay & Kefir

Good morning Susan,

I purchased your online series as a supplement to the DVDs which I already have and I have some comments, suggestions, questions. I have progressed a lot with my diet since I bought your DVD's which I watched but wasn't ready to embrace at the time so I am going through your online course with joy and appreciation.

My internet connection is painfully slow so its hard to watch the videos online. Please can you let me know if they are identical to the DVD's or if there is any added material and if so what. I hadn't thought to grind the sesame seeds that is a great idea - how long can I store them for before the oils go off or they oxidize? Can you get raw milk on Maui? I have heard that it is very expensive. I bloat if I make Kefir with milk and what you said about the enzymes in raw milk to help digestion makes sense. I would like to try that. I manage by combining milk with cream to make kefir but it really makes me put on weight. Maybe I don't digest fat too well. A great tip I got from Jack La Lanne is to rinse a thermos flask out so that it is wet inside and put it in the freezer overnight. Use it the next day to put your vegie juice in and it will keep fresh much longer. Some recipes call for juicing herbs but they just slip through the juicer when I do it so I have given up. do you have any suggestions.? I am working on supplementing my diet with herb teas for calcium, iron etc and using a dandelion chai instead of coffee which I like a little too much. Playing with teas is fun and a good way to keep hydrated when water isn't appealing. I am also experimenting with tips that I get passed onto me from David Wolfe who is such an innovator. One of them is using clay in various forms to absorb the toxins in our system because it attracts the positively charged irons in toxins. If you are interested I can forward you the emails with the information.

You are an inspiration, I wish I could come to your Saturday workshop but I am working. Thank you so much. I love your lightness and joy. Aloha, Rosy.

1 Comment

Share

2 Comments

Share

Coconut Cilantro Ginger Sauce

I really don't have to say much more than "Coconut Cilantro & Ginger". This sauce is simple and so delicious that you will be spooning it from the fridge when ever you think of it. It is fabulous on Kitcheree, wonderful on veggies or grains, and has the perfect flavors to wake up a white fish. All you have to do is blend the following ingredients together: 1/4 to 1/2 cup water

1/2 cup shredded coconut

1/2 to 3/4 cup fresh cilantro

1 tsp of freshly chopped ginger (or squeeze the ginger juice from finely grated ginger)

salt to taste

Blend all ingredients together. I like to keep it somewhat coarse, yet blended well. Store in a glass jar and enjoy on a variety of veggies. If you want to use it for a white fish or veggies, then drop a tsp or two in the saute pan with a little coconut oil. Add a dab of water. Cover and let simmer.

The flavors are to live for!

2 Comments

Share

2 Comments

Share

Rosemary Tofu Toast & Avocado

After a long day of moving, packing and cleaning I sure don't want to be in the kitchen long, and yet I am starving for something fulfilling, crispy with lots of flavor, protein and good fats.  This is one of my favorite quick meals that satisfies me completely. Here is how simple it is:

Snip some fresh Rosemary from your garden of herbs. I hope you have a little herb garden. Having fresh herbs handy helps to make almost any food come alive.

You will also need some Ezekiel Bread. That is bread that is made with only sprouted grains. In other words, it is flourless. There are many different brands and varieties of grains. Make sure it is Organic.

Ingredients:

Rosemary - about 1 tbsp chopped fine

1 piece of toast

2 slices of firm tofu - raw (it is surprisingly good raw when served this way)

2 tbsp olive oil

1/3 of an avocado

sea salt

Directions:

While the bread is toasting, heat some olive oil is a small sauce pan. Chop the rosemary fine and put in the pan with the olive oil. Let it sizzle and infuse in the oil. Turn off the heat. The idea is not to cook the rosemary/olive oil mixture,  but just to infuse it into the oil. Add a little salt.

Smooth a tablespoon of the rosemary oil on the toast. Pile on the tofu and spread the remaining olive oil mixture on top of the tofu. Place slices of avocado on top, and sprinkle with sea salt. Enjoy!


2 Comments

Share

4 Comments

Share

Easy Raw Cacao Truffle Recipe

By popular demand! Here is the recipe for these simple and yummy Raw Cacao Truffles (you can use any unsweetened cacao powder as well). They are luscious and creamy and make for a great afternoon pick up. Need I say more? Blend all the ingredients below together. No need to cook. When refrigerated/stored they last for a long time. They also firm up in the fridge and best when served at room temperature.

Recipe below is a basic recipe that seems to always vary. Mix ingredients to taste and explore other flavors with spices, nuts and seeds.

Main Ingredients:

1/2 cup Coconut Cream (sundried coconut meat ground into a butter-Artisana makes one as does Wilderness Family Naturals - online).

3/4 cup water (warmed)

1 to 2 tsp vanilla

1/2 cup maple syrup

3 tbsp coconut oil

2 tbsp raw sugar or honey (more to taste)

1/2 tsp salt (more or less to taste)

Optional: 1/2 cup cacao nibs - 1/2 cup shredded coconut - or any other nuts or seeds you would like to add. Seen in the picture above, Golden Yukon Berries (sour type raisins) are added. Cashews are great to garnish with as well.

You can also use cinnamon, cayenne, chili powder and other seasoning to make your own truffles.

Directions:

Begin by blending the coconut cream and coconut oil in warm water. Once blended, add maple syrup, sugar and salt or seasonings. When creamy, add cacao powder through a sifter to alleviate lumps. Blend in a little at a time. Mixture will thicken to a point where it is difficult to stir. If too dry, add a bit of water. Remember they will firm up when refrigerated. They will also thicken a bit when the cacao nibs, coconut and/or other nuts are added.

Roll into balls and place nuts or Golden Yukon Berry on top with slight pressure. Chill. Best to serve at room temperature.

These travel well, but remember to package in a container where they can soften and still hold their shape.

Yum!

4 Comments

Share

2 Comments

Share

Raw Buckwheat Porridge with Coconut Cream

Raw Buckwheat Porridge with Coconut Cream is one of the best breakfasts or afternoon snacks ever! It will satisfy a sweet tooth, fill you up and nourish you beyond your senses....all at the same time! Soak 1/2 cup buckwheat for at least 1 hour. Then rinse well and set aside. In a bowl put in 1 to 2 tablespoons coconut cream (or butter) concentrate (Artisana makes a good one) and mix with water for desired consistency and sweetness. Stir in buckwheat and top with walnuts, fresh apples and mint. This cereal or porridge is great with bananas and other fresh fruits and nuts. Enjoy while you Make Every Bite Count!

2 Comments

Share